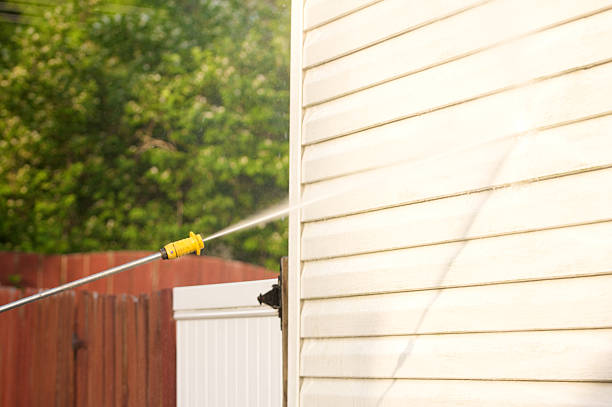
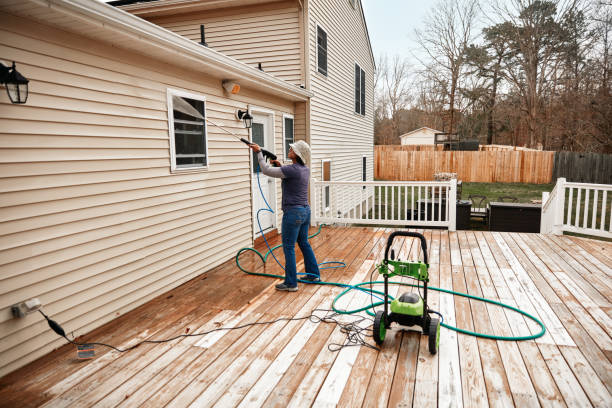
Are you looking to give your vinyl-sided house a fresh and clean look? One of the most effective ways to achieve this is by pressure washing. Pressure washing is a great way to remove dirt, grime, and even stubborn stains from your vinyl siding.
In this article, we will guide you through the step-by-step process of pressure washing your house with vinyl siding, ensuring that you achieve the best results while maintaining the integrity of the siding. From preparation and safety measures to choosing the right pressure and applying the cleaning solution, we will cover all the necessary steps.
Preparation and Safety
 Before you start pressure washing, it’s crucial to take the time to properly prepare and ensure your safety.
Start by examining the condition of your vinyl siding. Check for any loose or damaged pieces that may need to be repaired or replaced before pressure washing.
Cover any nearby plants or delicate surfaces with plastic sheeting or tarps to protect them from the force of the water.
Make sure to wear protective gear, such as safety glasses and gloves, to shield yourself from any debris or chemicals.
Additionally, familiarize yourself with the pressure washing equipment you will be using. Read the manufacturer’s instructions carefully and ensure that you have the necessary attachments and settings for your specific siding.
If you’re unsure about any aspect of the process, it’s always best to hire professional pressure washing services to ensure a safe and effective clean.
Equipment Needed
To get started, you’ll need the necessary gear to pressure wash the vinyl siding on your house. You’ll require a pressure washer, a garden hose, a spray nozzle, a ladder, safety goggles, and gloves. The pressure washer is the most crucial tool for this task as it’ll provide the necessary force to clean the siding effectively. Make sure the pressure washer has an adjustable setting to avoid damaging the vinyl.
Attach the garden hose to the pressure washer and connect the spray nozzle to control the water flow. Remember to wear safety goggles and gloves to protect yourself from any debris or chemicals. Lastly, use a ladder to safely reach higher areas of the siding.
With the right equipment, you’ll be ready to pressure wash your vinyl siding and make your house shine.
Choosing the Right Pressure
Make sure you select the perfect amount of force for your pressure washer, allowing the water to effortlessly remove years of grime and dirt from your home’s exterior.
When pressure washing vinyl siding, it’s important to choose the right pressure setting to avoid damaging the material. Vinyl is a durable material, but too much pressure can cause it to crack, warp, or even come off completely. On the other hand, using too little pressure may not effectively clean the siding.
To find the ideal pressure, start with a low setting and gradually increase it until you achieve the desired results. It’s recommended to start around 1500-2000 PSI for vinyl siding.
Remember, the goal is to clean the siding, not strip it or cause any damage. So take your time and choose the right pressure for the job.
Starting with a Clean Surface
Once you’ve chosen the perfect pressure, picture yourself standing in front of a spotless canvas, ready to unleash the power of your pressure washer on a clean surface. Starting with a clean surface is crucial when pressure washing vinyl siding.
Before you begin, make sure to remove any loose dirt or debris from the house’s exterior. This can be done by using a broom or a soft brush to gently sweep away any loose particles.
Next, use a mild detergent mixed with water to scrub the vinyl siding. This will help remove any stubborn stains or grime. Rinse the surface thoroughly, making sure to remove all the soap residue.
Once the surface is clean and free of any dirt, you can begin pressure washing to give your house’s vinyl siding a fresh and vibrant look.
Applying the Cleaning Solution
 Before you dive into the process, take a moment to envision the transformative effect that applying the cleaning solution will have on your vinyl siding.
The cleaning solution is a crucial step in the pressure washing process as it helps to remove dirt, grime, and mildew from your siding.
To apply the cleaning solution, start by attaching the appropriate nozzle to your pressure washer. Then, mix the cleaning solution according to the manufacturer’s instructions and fill the detergent tank of your pressure washer.
Begin by spraying the solution onto a small section of your siding, starting from the bottom and working your way up. Allow the solution to sit for a few minutes to loosen any stubborn stains.
Finally, rinse the section using the pressure wash setting, making sure to move in a sweeping motion to avoid any streaks or damage to the vinyl.
Repeat this process until you have cleaned the entire surface of your vinyl siding.
Working from Top to Bottom
To enhance the overall efficiency of the cleaning process, it’s advisable to commence from the uppermost part of the structure and work your way down when cleaning the vinyl siding.
Start by focusing on the roof siding and gutters, as these areas tend to accumulate dirt and debris. Use a pressure washer to remove any loose dirt or grime, making sure to adjust the pressure to avoid damaging the vinyl siding.
By working from top to bottom, you allow the cleaning solution to flow naturally downwards, effectively cleaning each section as you go. This method ensures that all areas of the vinyl siding receive equal attention and prevents any dirt or cleaning solution from settling on already cleaned areas.
Remember to thoroughly rinse each section before moving on to the next, leaving your vinyl siding looking clean and refreshed.
Rinsing and Drying
After thoroughly cleaning each section, it’s essential to rinse off any remaining cleaning solution and allow the vinyl siding to dry completely.
Start by attaching a wide-angle nozzle to your pressure washer and set it to a low-pressure setting. Begin rinsing at the top of the house and work your way down, making sure to cover all areas of the siding. Pay extra attention to any areas that may have accumulated more dirt or debris during the cleaning process.
As you rinse, be careful not to spray water directly into any openings or gaps in the siding, as this could cause water damage.
Once the rinsing is complete, leave the vinyl siding to air dry naturally. Avoid using any artificial heat sources to speed up the drying process, as this could damage the siding.
With proper rinsing and drying, your vinyl siding will be left looking clean and refreshed.
Removing Stubborn Stains
 Now that you’ve rinsed and dried your vinyl siding, it’s time to tackle those stubborn stains that may still be lingering. Don’t worry, with the power of a pressure wash, your house will be looking spotless in no time.
Whether it’s mold, mildew, or even grease stains, a pressure washer can effectively remove them all. Start by adjusting the pressure on your machine to a lower setting, as high pressure can damage the siding. Then, use a cleaning solution specifically designed for vinyl siding and apply it to the stained areas.
Allow the solution to sit for a few minutes, giving it time to break down the stains. Finally, use the pressure washer to rinse away the solution and the stains, working from the top of the house down. With a little patience and the right technique, your vinyl siding will be free from those stubborn stains in no time.
Protecting and Maintaining the Siding
Take a moment to consider the long-term benefits of safeguarding and caring for your beautiful exterior walls. When pressure washing your vinyl siding, it’s important to not only clean it, but also protect and maintain it.
Start by using a low-pressure setting on your pressure washer and holding it at least 12 inches away from the siding to prevent any damage. Avoid using harsh chemicals that could strip away the protective coating of your siding. Instead, opt for a mild detergent mixed with water to gently remove dirt and grime. Rinse thoroughly to ensure all soap residue is removed.
Regularly inspect your siding for any cracks or loose pieces, and repair them promptly to prevent further damage. Applying a coat of vinyl siding protectant every few years can also help maintain its appearance and prolong its lifespan.
Remember, taking the time to protect and maintain your vinyl siding will keep your house looking beautiful for years to come.
Final Tips and Considerations
Don’t forget these last few tips to ensure your exterior walls stay in pristine condition for years to come!
When pressure washing your house with vinyl siding, it’s important to also consider the other outdoor surfaces like your patio, deck, fence, and outdoor furniture. Before starting, make sure to remove any furniture or items that could get damaged by the water pressure.
Cover delicate plants or shrubs with plastic sheets to protect them from the cleaning solution. When cleaning the siding, be careful not to aim the spray directly at windows, as it could crack or break the glass.
After pressure washing, check for any loose or damaged siding and make any necessary repairs. Regular maintenance is key to keeping your vinyl siding looking its best and extending its lifespan.
Conclusion
 In conclusion, pressure washing your house with vinyl siding can be a simple and effective way to keep it looking clean and well-maintained. By following the proper preparation, safety precautions, and using the right equipment, you can easily remove dirt, grime, and stubborn stains.
Remember to always choose the appropriate pressure setting and use a gentle cleaning solution. Regular maintenance and protection will help prolong the lifespan of your siding and keep it looking its best for years to come. So go ahead and give your vinyl siding a thorough pressure wash, and enjoy a fresh and renewed appearance for your home.

Recent Comments