Are you tired of struggling to clean your windows with grids obstructing your view? Removing window grids may seem like a daunting task, but with the right tools and guidance, it can be a breeze.
Whether you have double-hung, casement, or sliding windows, this article will guide you through the process of removing the grids for easy cleaning. Having clean windows not only enhances the appearance of your home but also improves the overall quality of air indoors.
Window grids, also known as muntins or grilles, are the decorative strips that divide the windowpane into smaller sections. However, they often accumulate dirt and grime over time, making it difficult to clean the windows thoroughly. Removing the grids allows you to clean the entire windowpane and achieve a streak-free finish.
So, grab your tools and let’s get started!
Removing Window Grids
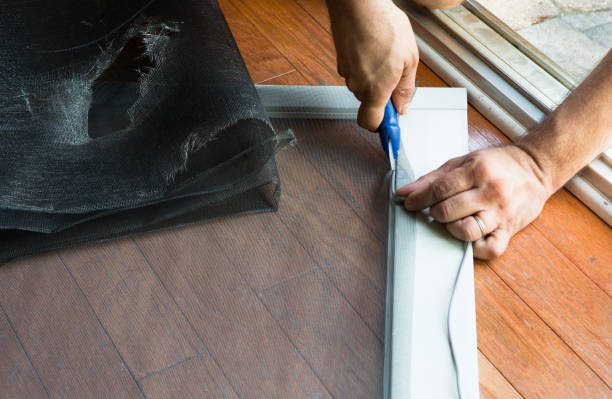 You’ll need to gently pry off the window grids with a flathead screwdriver to get them out for cleaning. Make sure to be careful not to damage the window frames when removing the grids.
Once you have removed the grids, clean them with a mild soap and water solution. You can also use a specialized cleaner for exterior cleaning if the grids are very dirty.
Regular maintenance of your window grids can help them last longer and stay looking great. It’s a good idea to clean them at least once a year, or more frequently if you live in an area with a lot of dust or pollution.
By taking care of your window grids, you can ensure that your windows look their best and that they function properly for years to come.
Types of Window Grids
There are various styles of grids that can be found on windows, adding texture and detail to the overall appearance. Some common types of window grids include colonial, diamond, and prairie style. Colonial grids are the most popular and feature a classic rectangular shape.
Diamond grids, as the name suggests, have a diamond shape and are commonly found on older homes. Prairie style grids are characterized by their horizontal and vertical lines, creating a more modern look.
When it comes to cleaning window grids, the type of grid will determine the best method. Most window cleaning services will have the necessary equipment to clean all types of grids. However, if you choose to clean them yourself, be sure to use a soft brush or cloth and avoid using abrasive materials that could damage the grid.
With the right approach, cleaning your window grids can be a simple task that’ll keep your house looking its best.
Tools Needed
To prepare for the task of removing window grids for cleaning, gather a few items such as a soft brush, cloth, and mild cleaning solution. You may also need a screwdriver to loosen any screws holding the grids in place.
Make sure to place a towel or drop cloth underneath the window to catch any dirt or debris that may fall during the process.
If your windows are located on the second floor or higher, you may want to consider using a ladder or hiring professional pressure washing services to avoid any accidents.
Additionally, be mindful of any nearby roof siding, stucco, or tile that may be damaged by water or cleaning solution runoff.
With the right tools and precautions, removing window grids for cleaning can be a simple and satisfying task.
Preparing the Window
 Before starting the process, it’s important to get the window ready for a sparkling finish. Begin by clearing the area around the window, making sure there are no obstacles that could interfere with the process.
Move any outdoor furniture, plants, or decor away from the window to a safe distance, so they won’t be damaged during the cleaning process.
Next, check the gutters above the window and make sure they’re clean and free of debris. This will prevent any water or dirt runoff from staining the newly cleaned windows.
You should also sweep any dirt, dust, or leaves off the driveway, sidewalk, patio, or deck below the window to prevent them from blowing onto the windows while they’re drying.
By taking these simple steps, you’ll ensure that your window cleaning project will be successful and your windows will look their best.
Removing the Grids
One key step in achieving a truly pristine window finish is getting rid of those pesky window grids. Removing the grids is a relatively simple process that can be done with just a few tools and a bit of elbow grease.
To begin, position a ladder securely on a level surface such as your driveway, sidewalk, or lawn. Make sure it’s close enough to the window so you can easily reach the grids.
Next, carefully remove any screws or clips that are holding the grids in place. Be sure to keep track of these fasteners so you can easily reattach the grids when you’re done cleaning them.
Once the grids are free, gently pull them out of the window frame and place them on a clean, flat surface. Make sure not to damage the grids or the window frame in the process.
With the grids out of the way, you can now clean your windows, gutters, and outdoor furniture with ease, leaving your home looking its best.
Cleaning the Grids
Now that you’ve successfully removed the grids from your windows, it’s time to clean them. It’s important to clean your window grids regularly as they tend to collect dust and grime over time.
Cleaning them will not only improve the appearance of your windows but also help them function properly. To begin, lay your window grids on a flat surface such as a fence or table.
You can use a mild detergent and warm water to clean the grids. Simply dip a soft-bristled brush or sponge into the cleaning solution and gently scrub the grids. Rinse them thoroughly with water and allow them to dry completely before reattaching them to your windows.
While the grids dry, take advantage of the beautiful weather and enjoy your outdoor space by relaxing by the pool, spa, or barbecue, or tending to your garden.
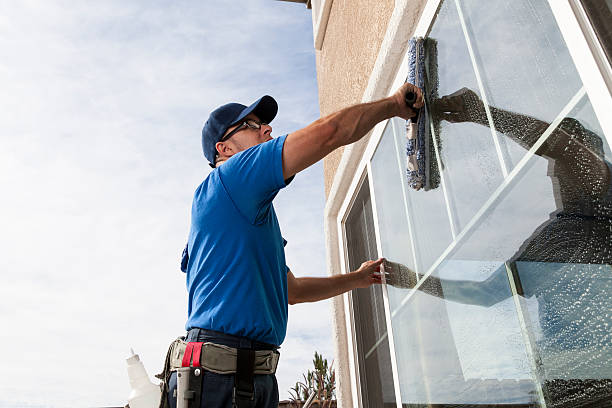
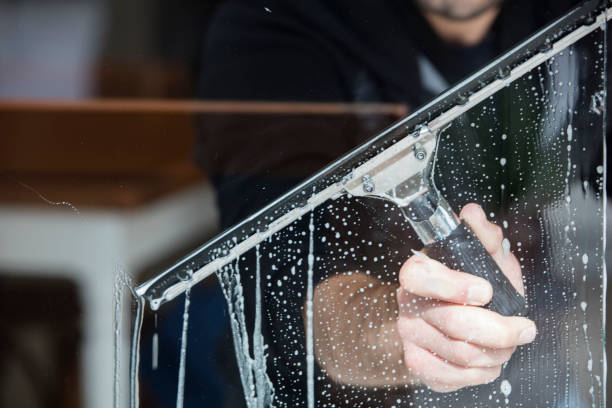
Cleaning the Window
 It’s always satisfying to see your reflection in a spotlessly clean window, so let’s get to work and make those panes shine!
Start by removing any debris or dirt that may have accumulated on the window. You can use a soft-bristled brush or a cloth to wipe away any dirt, dust, or cobwebs. Be sure to clean both the inside and outside of the window.
Next, you’ll want to clean the window using a commercial glass cleaner or a homemade solution made up of equal parts vinegar and water. Spray the cleaner onto the window and use a cloth or squeegee to wipe away the solution.
If you have hard-to-reach windows, consider using a ladder or hiring a professional window cleaning service.
Once you’ve finished cleaning the window, take a step back and admire the beautiful view of your patio, hot tub, trees, and shrubs through your newly cleaned window.
Reinstalling the Grids
Let’s get those grids back in place and enjoy the finished look of our freshly cleaned windows!
First, check to make sure that the grids are dry and free of any dust or debris. Then, carefully align the grid with the window frame and gently push it back into place. The grids should click securely into their slots.
Once all of the grids are back in place, step back and admire the view! You may notice that your patio, building, trees, shrubs, and flowers look even better now that the windows are sparkling clean and the grids are neatly in place.
Enjoy the natural beauty around you and the clear view from your newly cleaned windows.
Finishing Touches
You’ll be amazed at how much brighter and more inviting your home feels with your newly polished windows and carefully replaced grids. Now that you’ve successfully removed and cleaned your window grids, it’s time to focus on the finishing touches.
Take a step back and admire your hard work. You can now see the patio, hot tub, trees, shrubs, and building in all their glory.
Before you move on to other tasks, take a moment to wipe down the window sills and frames with a damp cloth. This will remove any dirt or dust that may have accumulated during the grid removal process.
Once you’ve finished, sit back and enjoy the clear view of the world outside your windows. Your efforts have paid off, and your home looks and feels cleaner and brighter.
Maintenance Tips
To keep your windows looking their best, it’s important to regularly maintain them by wiping down the sills and frames with a damp cloth. This will help remove any dirt and dust that may have accumulated over time.
Additionally, you should also check the weather stripping around the window to make sure it’s in good condition and replace it if necessary.
Another important maintenance tip is to inspect the window grids periodically and remove any dirt or debris that may have accumulated on them. You can easily remove the grids by using a screwdriver to loosen the screws that hold them in place.
Once the screws are removed, gently lift the grid out of the window frame and clean it with a soft brush or cloth.
By regularly maintaining your windows, you can ensure that they’ll continue to look great and function properly for years to come.
Conclusion
 Congratulations! You’ve successfully removed, cleaned, and reinstalled your window grids. You can now enjoy sparkling clean windows without the hassle of dirt and grime buildup. Remember to clean your window grids regularly to maintain their appearance and functionality.
To keep your windows in great condition, make sure to perform routine maintenance checks. Check for any cracks or damages in the glass or frame, and repair them as soon as possible. Keep an eye on the weather stripping and replace it if necessary.
By following these simple tips, you can keep your windows looking great and functioning properly for years to come.
Signature Window Washing: Your Solution for Sparkling Homes in Denver! We specialize in residential window cleaning and washing, leaving your windows crystal clear and your home shining bright. But that’s not all! Our expert team also offers top-notch gutter cleaning services in Denver, CO. Say goodbye to clogged gutters and hello to a pristine home. Experience the Signature touch and make your home shine inside and out!
Recent Comments