Softwashing your windows is a great way to keep them looking clean and streak-free. It’s also a lot less labor-intensive than traditional window-washing techniques.
In this article, we’ll be discussing the tools and equipment you’ll need, the cleaning solutions you can use, the safety procedures you should follow, and the proper application techniques. So if you’re ready to give your windows a professional clean, let’s get started!
Tools and Equipment
 Cleaning your windows doesn’t have to be a chore – get the right tools and equipment, and you’ll be done in no time!
For softwashing windows, you’ll need a few specific tools and pieces of equipment. First, you’ll need a window-cleaning solution. You can buy window cleaning solutions specifically designed for softwashing, which are gentler on the window surface than traditional cleaning solutions.
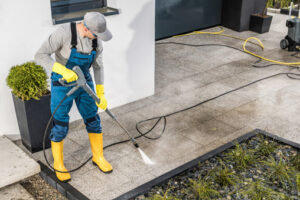
You’ll also need a soft wash sprayer, which is equipped with the pressure settings needed to spray the solution onto your windows. Finally, you’ll need a squeegee and some microfiber cloths to wipe away the solution and any dirt or grime.
With these tools and equipment, you’ll be able to clean your windows quickly and easily.
Cleaning Solutions
To get your windows looking spotless, you’ll need the right cleaning solutions. Softwashing typically requires a special cleaning solution that is specifically designed for windows to prevent staining and damage.
The solution, usually a mix of detergent, surfactant, and water, is applied to the window with a soft brush to loosen dirt and grime without causing any damage. You may also need a degreaser solution to remove any stubborn stains or build up.
When choosing a cleaning solution, make sure you select one that is specifically designed for softwashing windows to ensure the best results. Once you have the right cleaning solution, you can start softwashing your windows and enjoy the beautiful results.
Safety Procedures
When softwashing windows, it’s important to take safety precautions to protect yourself and your property. First, make sure you wear protective gear and that your team is aware of the safety procedures.
If you are working at heights, make sure you have the right safety equipment. Before starting the softwash process, it’s important to get an estimate of the job, so you know exactly what is involved. Make sure your team is up to date on all the safety procedures and that everyone is aware of the risks of the job.
Additionally, it’s important to double check that all the window frames are secure and that no glass has been broken. Taking the proper safety procedures when softwashing windows can help to ensure that the job is done right and that no one is injured in the process.
Surface Preparation
Before beginning any softwashing process, it’s important to properly prepare the surface to ensure the best results.
This includes cleaning the gutters, house siding, decks, and roofs of any dirt and debris.
Start by using a brush or broom to remove any cobwebs and dust.
If there’s any mold or mildew present, it should be treated with a mixture of chlorine or sodium hypochlorite.
Once the surface is clean, use a pressure washer to remove any remaining residue.
Be sure to use caution when pressure washing, as too much pressure can cause damage to the surface.
Application Techniques
 Once the surface is prepped, it’s time to get to work applying the softwashing solution to the window. First, use a low-pressure sprayer to apply the solution across the entire window surface. For best results, try to ensure that the solution is evenly distributed.
For areas that are heavily soiled, you may need to use a brush or scrubber to loosen the grime before applying the softwashing solution.
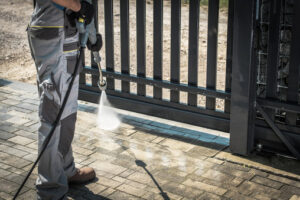
When softwashing fences, use a low-pressure sprayer to apply the solution in overlapping strokes. Make sure to get into all the crevices and other hard-to-reach spots.
Depending on the type of fence, you may need to use a long-handled brush to scrub the fence prior to applying the softwashing solution. This will help ensure the best possible results.
Rinsing Methods
Now that you know the right application techniques for softwashing windows, it’s time to turn to the different rinsing methods that are available.
Different materials require different rinsing methods in order to ensure that the windows are properly cleaned. For example, for tiles, you should use a low pressure rinse. For metal, you should use a medium pressure rinse. For wood, you should use a high pressure rinse.
Keep in mind that you should always use the least amount of pressure needed to clean the windows, as too much pressure can damage the material. Professional softwashing services can help you determine the right amount of pressure for your window materials.
Drying Process
Once the rinsing process is complete, the drying process must be attended to in order to ensure a spotless finish.
The best method to dry the windows is to use a long-handled squeegee and a chamois cloth. Start at the top of the window and then work your way down, using a back-and-forth motion to remove as much excess water as possible.
If a driveway or shingle asphalt is present, you can use a high-powered pressure washer to help with the removal process and also to seal the windows afterward.
Once the windows have been dried, it’s important to apply a sealer to prevent water spots from appearing. This’ll help keep the windows looking clean and spotless for a longer period of time.
Removing Stains
 You can use a special cleaning solution to remove stubborn stains from your windows, scrubbing gently with a soft cloth for best results. For hard surfaces such as a porch, patio, or sidewalk, you can use a higher concentration of the solution and a stiff brush or broom to get rid of any buildup. For stone or concrete surfaces, you may need to use a pressure washer to completely erase any discoloration and restore your windows to their original condition.
Troubleshooting
Now that you’ve finished removing the stains from the windows, it’s time to troubleshoot any areas that may be causing you difficulty. Depending on the size of the job, this can take some time as you need to make sure all of the windows are spotless.
If you’re dealing with a brick area, you may need to use a specialized cleaning solution to make sure no dirt or grime remains. Additionally, you may need to go over the entire area multiple times to ensure that all of the dirt and debris has been removed.
Taking your time with the job is essential to ensure that the windows are left spotless.
Preventative Maintenance
Maintaining the windows regularly is key to keeping them looking their best, so be sure to give them a good scrub every once in a while to keep them sparkling clean. Softwashing windows is an effective way to remove dirt, grime, and other buildup without damaging the window surface.
Start by using a mild detergent and warm water to clean the window, then rinse it with a garden hose. Afterward, use a microfibre cloth to dry the window and get a streak-free finish.
For added protection, use a UV protectant to help preserve the window and reduce the need for future cleaning. You can also apply a sealant to the window frame to prevent moisture and dirt from entering.
Regularly checking for any signs of damage or wear and tear can also help prolong the life of your windows and ensure they remain in good condition.
Conclusion
 Wrapping up, you now know how to softwash windows like a pro. It requires the right tools and solutions, as well as safety precautions and surface preparation.
You’ll apply the cleaning solution with specific techniques, then dry it off and remove any stains. Now you can troubleshoot any issues that arise and perform preventative maintenance. You’re now well-equipped to clean windows like a professional and keep them looking great for years to come. So go ahead and get started! It’s amazing what a difference softwashing can make.

Recent Comments