 Having clean windows is essential for improving the look of any home or office. But with all the angles and hard-to-reach places, cleaning them can be a daunting task. Fortunately, there are some tips and tricks you can use to make window cleaning easier and more efficient. In this article, we’ll show you how to tilt your window for cleaning in just a few simple steps.
Do you dread having to clean your windows? Are you afraid of breaking them while trying to reach those hard-to-get spots? Don’t worry; there is an easy solution that will help you clean your windows without risking any damage. Tilt the window for cleaning! By following our step-by-step guide, you’ll be able to get perfect streak-free glass every time – no ladders or special tools required.
We’ll walk you through the process of tilting your windows safely and effectively so that you can enjoy a crystal clear view without spending hours scrubbing away at dirt and grime. So don’t wait any longer – read on to learn how to tilt your window for cleaning like a pro!
Preparation For Tilt Window Cleaning
Before you begin to tilt a window for cleaning, it is important to prepare the area. You’ll need the right supplies and tools, such as a step ladder, paper towels, a bucket of warm water with dish soap, a squeegee and a scrub brush. It’s also helpful to have some old rags or towels handy for wiping up any excess water or soap residue.
Once you’ve collected all your supplies, you should make sure that the window itself is free of any dirt or debris. Check around the edges of the window frame and use a damp cloth to wipe away any dust or dirt. This will help ensure that your cleaning solution doesn’t mix with any dirt particles and cause streaks on the glass during washing.
The next step is to open the window so that you can tilt it outward for easy access. Make sure there are no obstructions in place before trying to open it; this could damage either your window or its frame if not done carefully. Once the window is opened fully, you can begin tilting it outward for cleaning purposes.
Understanding The Window Pane
The first step in tilting a window for cleaning is understanding the window pane. Typically, a window consists of two sashes that move independently of each other. The top sash slides vertically, while the bottom sash slides horizontally. In order to tilt the window outward, you’ll need to use the lower sash and slide it up at an angle. This will allow you to tilt the entire window outward so that you can clean both sides easily.
Another important factor to consider when tilting a window for cleaning is safety. Make sure that you have a secure footing when standing on your ladder, as well as something sturdy to hold onto while tilting the window outward. You should also be aware of any cords or wires that could potentially become tangled in the process. It’s always best to err on the side of caution when handling any type of equipment or machinery, even if it’s just a simple task like tilting a window.
Once everything is set up and ready to go, you can begin tilting your window outward. Be sure to do it slowly and carefully; this will help prevent any damage from occurring during the process. With proper preparation and careful execution, you should have no problem completing this task quickly and safely!
Identifying The Parts Of A Tilt Window
Once you understand the basics of how a window pane works, it’s important to identify the parts of a tilt window. A tilt window is typically made up of two sashes that move independently of one another. The top sash slides vertically while the lower sash slides horizontally. In order to tilt the window outward, you’ll need to use the lower sash and slide it up at an angle.
The next step in tilting a window for cleaning is to make sure that you have a secure footing when standing on your ladder, as well as something sturdy to hold onto while tilting the window outward. You should also be aware of any cords or wires that could potentially become tangled in the process. Taking these safety precautions is essential before attempting any sort of maintenance on a tilt window.
Once everything is set up and ready to go, you can begin tilting your window outward slowly and carefully. Make sure that you don’t over-exert yourself or exert too much pressure on the frame, as this could cause damage to both yourself and the window itself. With proper preparation and caution, you should be able to complete this task quickly and safely.
Avoiding Damages To Your Windows
As you tilt your window outward, it’s important to remember that the frame of the window is delicate and can easily be damaged if too much pressure is applied. To avoid any damages, make sure that you are using a steady and even force when pushing or pulling on the window. Additionally, be sure to keep an eye out for any debris or dirt that could collect in the sash tracks or corners as this could prevent the window from closing properly after cleaning.
It’s also important to avoid using harsh chemicals or abrasive materials when cleaning your windows. These substances may seem like a quick fix for dirt and grime, but they can actually damage both the frame and glass of your tilt window. Instead, opt for mild soap and water when cleaning to ensure that your windows remain in good condition.
Finally, before closing your window back up again, make sure to check all of its parts for any signs of wear or tear such as cracked seals or broken hardware. If you notice any issues while inspecting your window, it’s best to contact a professional repair service before attempting any repairs yourself as this will help prevent further damage from occurring. Taking these steps will help ensure that your tilt windows remain secure and functioning properly over time.
How To Safely Remove The Window Sash
 Before you can effectively clean your tilt window, you’ll need to safely remove the window sash. To do this, start by opening the window as far as it will go. Then, locate the locking mechanism on both sides of the window and release it by pushing down on the lever or handle. Once unlocked, carefully push and pull on either side of the sash to lift it off its tracks. Once you have completely removed the sash, set it aside in a safe place until you are ready to replace it.
Now that the window is open and the sash has been removed, you can begin cleaning all parts of your tilting window. Make sure to use a soft cloth or brush and an appropriate cleaner when wiping down each part of the window to avoid causing any damage. Additionally, be sure to pay special attention to any crevices or hard-to-reach areas where dirt may have built up over time.
Once everything has been cleaned, you can move on to replacing the sash back into its tracks. To do this, start by positioning one end of the sash back onto its track before slowly pushing and pulling until it is fully locked into place. Once secure, make sure that there are no gaps or cracks between the frame and sash before closing up your window again. Doing this will help ensure that your tilt windows remain secure while also helping them last longer over time with proper maintenance
Gather Necessary Tools And Supplies
Now that you have a better understanding of how to remove and replace the window sash, it’s time to gather everything you need for a successful cleaning. To do this, start by assembling the necessary tools and supplies, which should include a clean cloth or brush, an appropriate cleaner, gloves, and any other items that may be required to reach difficult areas. Additionally, make sure to have a step ladder on hand if you will be cleaning anything beyond your reach.
It is also important to ensure that your work area is properly prepared before beginning the cleaning process. This means clearing away any furniture or decorations near the window and making sure that there are no objects blocking your access to it. Once everything is prepped, you can then begin wiping down each part of the window using the cleaner and cloth/brush as needed.
Take your time as you clean each area and pay special attention to any crevices or hard-to-reach spots where dirt may have accumulated over time. When finished, double check all parts of the window for any remaining dirt or debris before putting away your tools and supplies. This way you can guarantee that your windows are thoroughly cleaned without causing any damage in the process.
Assembling A Ladder For Accessibility
Once you have all the necessary tools and supplies gathered, it is time to start assembling a ladder for accessibility. Having a ladder on hand is essential for safely reaching higher windows that may be out of your reach. When selecting a ladder, make sure to check the weight limits and look for one with rubber grips on the feet for extra stability.
Before placing the ladder in position, be sure to double check that there is nothing blocking its path or that could potentially obstruct your view. Once the ladder is set in place, take extra caution when climbing up and down as well as when moving around it while cleaning. Doing so will help keep you from slipping or falling and ensure that the job can be done safely and efficiently.
When everything is ready, you can then begin tilting the window sash to get access to all sides of the glass. Make sure to tilt it at an angle where you can comfortably reach all areas without having to balance yourself precariously or lean over too far. This will allow you to clean both the inside and outside of your window with ease.
Scraping Away Dirt And Grime
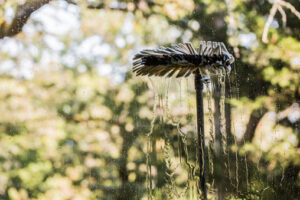
Once you have the window sash tilted to the desired angle, it’s time to start scraping away dirt and grime. Start by using a scraper with a soft brush attachment to loosen any debris that has built up over time. This will help make the cleaning process easier and more effective. Once you’ve gone over the entire surface of your window, use another cloth or sponge to wipe away any remaining residue. Be sure to rinse off the cleaning supplies regularly so they don’t spread dirt around on your windows.
To get into all the nooks and crannies, you can use a small scrub brush or toothbrush. This will help ensure that no area is left untouched and that your windows are as clean as possible. Additionally, if you’re dealing with tougher stains or grime, you may want to invest in a specialized cleaner designed specifically for windows. This will help make sure that your glass surfaces stay looking clear and bright for years to come.
Once everything is thoroughly cleaned and dried, carefully lower the window sash back into its original position. To finish off, wipe down any areas that may have come in contact with water during the cleaning process. With these few simple steps, you can keep your windows sparkling clean no matter how high up they are!
Wiping Down With Soapy Water
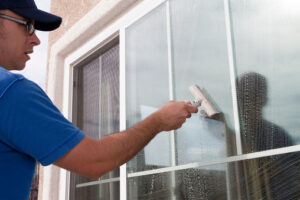
 Once the window sash is tilted and all debris has been scraped away, it’s time to move on to the next step: wiping down with soapy water. Start by preparing a bucket of warm, soapy water and then dampen a cloth or sponge in the solution. Gently wipe down the entire surface of your window, taking extra care around corners and edges. Make sure that you don’t apply too much pressure or scrub too hard since this can damage the glass.
When you’re done wiping down the windows, use a clean, dry cloth to remove any excess moisture. This will help prevent streaks from forming on your windows and keep them looking nice and bright. Don’t forget to rinse out your cleaning supplies with fresh water after each use as well.
Finally, make sure that you don’t leave any suds behind as they can attract more dirt or cause smearing. To ensure that all traces of soap are gone, take a damp cloth once more and give your windows one final wipe-down. With these simple steps, you can have sparkling clean windows in no time!
Drying And Polishing Surfaces
Now that your windows are squeaky clean, it’s time to give them a final shine. To start, use a dry cloth to thoroughly dry the surface of each window. Make sure that you pay special attention to the edges and corners as these areas tend to retain moisture. Once the windows are completely dry, you can move on to polishing them with a glass cleaner.
Spray the cleaner onto a clean cloth and then buff it into the glass in small circles. This will help restore the natural shine of your windows and keep them looking like new for longer. When you’re done polishing, use another dry cloth to wipe away any residue or streaks that may remain behind.
With these steps complete, your windows should be sparkling clean and ready for their next adventure!
Reinstalling The Window Sash
Now that your windows are sparkling, it’s time to reinstall the window sash. Before doing so, check that the tracks along the edge of the frame are free of dirt and debris. If any clumps remain, use a vacuum to remove them. Once the tracks are clear, you’ll be ready to start putting the sash back in place.
Begin by carefully lifting each side of the window into its respective track. Make sure that you keep it level while doing so and press firmly until both sides click into place. Also, pay attention to how tight or loose it feels – if either side is too tight or too loose, adjust accordingly by gently tapping on either end with a rubber mallet.
Once you’re satisfied with how snugly the window fits in its tracks, tilt it open for cleaning as needed. To do this safely, make sure to hold onto each side as you tilt it outward until it locks in place. This will help ensure that you don’t accidentally drop your window and damage anything around it. With this done, your windows should be ready for their next adventure!
Sealing And Caulking Cracks
Now that you’ve successfully tilted your window for cleaning, it’s important to take the next step in maintaining its integrity: sealing and caulking any cracks between the frame and sash. This will help prevent water from entering your home, as well as maintain the efficiency of your window.
Begin by inspecting the frame closely for any visible gaps. If you find any, use a putty knife to scrape away any existing sealant or caulk. Then, apply a fresh layer of caulk with a caulking gun – make sure that it fills all gaps evenly and covers any exposed screws or nails. Allow this to dry completely before continuing.
After the fresh sealant has had time to set, inspect it one more time to ensure that no new cracks have formed. If everything looks good, you can rest assured knowing that your windows are sealed properly and ready to keep out water and cold air!
Cleaning The Window Tracks
Now that you’ve sealed up the gaps in your window, it’s time to move onto cleaning the tracks. Dirt and debris can accumulate in the tracks over time, which can make it difficult to open and close your windows. Fortunately, this is an easy fix!
Start off by using a vacuum cleaner or brush attachment to remove any visible dirt or dust from the track. If there are any embedded pieces of dirt or grime, you may need to use a damp cloth with some mild soap to get them out. Be sure to rinse off any soap residue with a fresh damp cloth.
After cleaning out the tracks, dry them off thoroughly with a soft cloth before applying a thin layer of lubricant such as WD-40 or petroleum jelly. This will help ensure that your windows open and close smoothly for years to come.
Finishing Touches On Your Windows
The final step in cleaning and maintaining your windows is to give them a bit of extra love. First, take a few minutes to wipe down the outside of the window with a damp cloth or sponge. You can use some window cleaner if necessary, but be sure to rinse it off afterwards so that there are no streaks left behind.
It’s also important to check the seal around your windows from time to time. Look for any gaps or cracks and make sure they are sealed up properly. If you find any drafts coming through, consider getting some weatherstripping or caulking to fill in the gap.
Finally, tilt the windows open at least once a year and give them a good clean inside and out. This will help keep them in tip-top shape and ensure that they open and close easily for years to come.
Prevention Tips For Future Maintenance
To keep your windows in top condition, it’s important to take some preventative measures. While regular cleaning is essential, there are a few extra steps you can take to make sure your windows stay looking great for years to come.
First, invest in some window screens and keep them in place when you don’t need the windows open. This will help protect the glass from dirt and debris that can accumulate over time and cause damage. Additionally, make sure the windows themselves are well sealed so that no air or moisture can get inside.
Finally, check the hinges of your windows periodically and lubricate them as needed with an appropriate lubricant. Doing this will ensure they open and close smoothly without any sticking or grinding. Taking these simple prevention steps can go a long way towards preserving the life of your windows and keeping them clean and functioning properly.
Conclusion
 Maintaining your tilt window is important for the health of your home and the safety of your family. Taking time to properly clean and lubricate the window will save you money in repairs down the road. It only takes a few minutes to make sure that your tilt window is working correctly, but it can have a huge impact on how well your windows function and look.
By following these steps, you will be able to tilt your window safely and easily for cleaning. Taking the time to understand how the window works and what parts are involved will help prevent any damages from occurring during cleaning or future maintenance. Properly sealing any cracks or gaps in the window frame will also ensure that no water damage occurs over time.
Overall, cleaning a tilt window is an easy process that should be done regularly to ensure its longevity and effectiveness. Learning how to do it correctly can save you money in repairs and help keep your home secure from outside elements. By taking these steps, you will be able to enjoy clean and beautiful windows for years to come!
Recent Comments