Pressure washing is a great way to give your home’s exterior a deep clean and make it look like new. But if you don’t know how long to wait after pressure washing to stain, you can end up making costly mistakes. Knowing the right amount of time to wait before staining after pressure washing is essential for getting the best results.
In this article, we’ll discuss the steps you need to take in order to properly prepare your home’s exterior for staining after pressure washing. We’ll explain the importance of waiting the right amount of time before applying stain, and provide tips on how to ensure that your project turns out looking great. So if you’re ready to tackle this project, read on!
Preparation For Staining
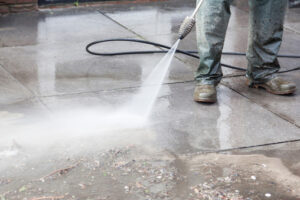 Pressure washing is an essential part of the process when it comes to staining wood. It removes dirt, grime, and other particles that can prevent a smooth application of the stain. Hiring a professional cleaning service is often the best choice for this task, as they have the necessary equipment and know-how to do the job right.
However, it’s important to note that there is a waiting period after pressure washing before you should apply any wood grain stains. If you rush into applying the stain too soon after pressure washing, it won’t adhere properly and could cause damage to your wood surface. To ensure that your project will turn out just as you want it to, wait at least 24 hours after power washing before beginning any staining process.
During this waiting period, make sure to inspect the surface for any visible damage or blemishes that need attention prior to staining. Also check for any leftover debris from the pressure washing process and clean up as needed. Taking these extra steps will help you get optimal results from your house cleaning project and make sure that your stain looks stunning when finished!
Choosing The Right Stain For Your Project
Once the waiting period is over and the surface is ready to be stained, it’s time to choose the right stain for your project. Cleaning services often offer a wide variety of stains, so you’ll have plenty of options. Consider the type of wood you’re working with, such as whether it’s a wood deck or another type of surface. The natural grain of the wood will also affect your choice, as some stains are better suited for certain types of wood than others.
When selecting a stain for your project, think about how much protection and durability you need. If you want something that will last for years and stand up to wear and tear from the elements, then oil-based stains may be best. On the other hand, if you’re looking for a more subtle look with less shine, then water-based stains are probably your best bet.
No matter which type of stain you choose, make sure it’s compatible with the pressure washing method used in your cleaning service. Different cleaning solutions can sometimes react negatively with certain types of stains, so double check before committing to one particular product. With careful consideration and knowledge about what works best for your project, you can find just the right stain to bring out the beauty in any wooden surface!
Benefits Of Pressure Washing
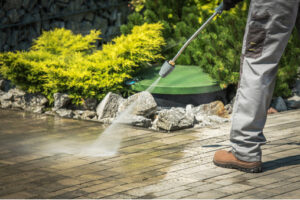
The benefits of pressure washing are many and varied. Pressure washing is an effective way to remove dirt, grime, mold, and mildew from hard surfaces like wooden decks and fences. It can also be used to remove stubborn stains and discoloration that might otherwise require sanding or other intense cleaning methods. In addition to giving your wood a clean look, pressure washing can also protect the wood from further damage caused by moisture and weathering.
One of the most important things to keep in mind when pressure washing is timing. You should always wait at least a day before applying any kind of stain or sealant after pressure washing. This allows the surface time to dry out completely before being treated with any kind of protective coating. If you apply stain or sealant too soon after pressure washing, it could result in uneven coverage and splotchy results.
It’s important to note that while waiting for the surface to dry out is essential, it doesn’t have to take days or weeks – depending on the temperature and humidity levels, it may only take a few hours for the surface to be ready for staining. Be sure to check with your cleaning service on the best time frame for staining after pressure washing and use this information as a guide when planning your project.
What To Consider Before Pressure Washing
Before pressure washing any surface, there are a few things to keep in mind. First and foremost, you should always make sure that the surface is clean before beginning the project. Pressure washing can force dirt and debris further into the wood or material, making it more difficult to remove later on. It’s also important to consider the type of surface you’re going to be cleaning. Different surfaces require different levels of pressure and cleaning solutions, so it’s important to select the right tools for your job.
Additionally, you should always use protective gear when pressure washing – this includes safety glasses and gloves as well as long sleeves and pants. Pressure washers put out powerful streams of water which can cause serious harm if not handled properly. Finally, it’s important to check with local laws and regulations concerning pressure washing before beginning a project, as some municipalities have restrictions on power washers or may require permits for certain projects.
By taking these simple steps prior to starting a pressure washing project, you’ll ensure that your job goes smoothly and safely from start to finish.
Safety Tips For Pressure Washing
 Once you have all the right tools and have considered all the necessary factors, it’s time to begin pressure washing. To ensure a safe, successful job, there are a few key safety tips to keep in mind. First and foremost, never point the nozzle of a pressure washer at any person or animal. Even if the pressure is set on low, it can still cause serious harm. Additionally, always make sure that the surface you’re working on is stable and secure; wet surfaces can be slippery and dangerous to work on.
It’s also important to use caution when changing nozzles or moving around the area where you’re working. The powerful streams of water coming from a pressure washer can move objects or push them in directions you don’t expect – so always be aware of your surroundings and make sure that nothing hazardous is within reach of your power washer stream. Finally, it’s important to pay attention to your own body while pressure washing; take breaks as needed to rest and avoid fatigue-related accidents.
By following these safety tips while pressure washing, you’ll be able to finish your project safely and efficiently with minimal risks.
The Process Of Pressure Washing
Now that safety considerations have been taken into account, it’s time to get started with the actual process of pressure washing. The first step is to set up your work area; make sure that your pressure washer is placed on a stable surface, and ensure that you are wearing the appropriate protective gear. As you begin setting up, check all hoses and connectors for any signs of wear or damage.
Once everything is ready to go, it’s time to start pressure washing. Begin by selecting the appropriate nozzle for the job; different nozzles allow for different levels of power, so be sure to choose one that will give you the desired result without causing any damage. Once you’ve chosen a nozzle and connected it to your power washer, adjust the settings as needed so that you’ll be able to apply the right amount of water pressure to the surface being cleaned.
Finally, it’s important to know how long you should wait before staining or sealing after pressure washing. Generally speaking, most surfaces should be allowed 24-48 hours before applying new sealant or stain in order for them to dry properly and prevent any damage from occurring. This time frame may vary depending on environmental factors such as humidity levels and temperature – so if in doubt, consult a professional before proceeding with any additional treatment.
Drying After Pressure Washing
Once the pressure washing process is complete, it’s important to allow the surface to dry thoroughly before staining or sealing. This step is critical for ensuring that new sealant or stain adheres correctly and prevents damage from occurring. Drying times may vary depending on environmental factors such as humidity and temperature, so it’s important to pay close attention to these factors when determining how long you’ll need to wait before proceeding with additional treatment.
In most cases, allowing 24-48 hours for drying should be sufficient; however, in more extreme conditions it may take longer for the surface to completely dry. If you are in doubt about how much time you should wait, consult a professional for advice before proceeding with any additional treatments. Additionally, keep an eye out for any signs of moisture seeping into the material as this could indicate that more drying time is needed before applying new stain or sealant.
When the desired amount of drying time has been achieved, you can then proceed with applying a new coat of sealant or stain – just make sure that you follow any instructions provided by the manufacturer closely in order to ensure that you get the desired results without causing any damage.
Recommended Time To Wait Before Staining
Now that the surface has had adequate time to dry, it’s time to start thinking about when you should begin staining. Generally speaking, it’s recommended that you wait at least 24-48 hours after pressure washing before applying a new coat of stain or sealant. This gives the material enough time to fully absorb any moisture and ensures that the sealant or stain adheres properly.
For more extreme conditions, such as high humidity or cold temperatures, you may need to wait even longer for the material to dry completely – in these cases, it’s best to consult with a professional before proceeding with any additional treatments. Additionally, keep an eye out for any signs of moisture seeping into the material as this could indicate that more drying time is needed before applying new stain or sealant.
When you are confident that sufficient drying time has been achieved and all instructions provided by the manufacturer have been followed closely, then you can begin staining or sealing the surface. This will ensure that your project looks its best and lasts for many years to come!
Potential Hazards Of Premature Staining
It’s essential to make sure that the surface is completely dry before applying a new coat of stain or sealant. If applied too soon, the moisture can cause the material to swell and warp, leading to a variety of issues such as bubbling, cracking, and color fading. Furthermore, any trapped moisture could also lead to mold or mildew growth which can cause permanent damage to the surface.
In addition, there are potential safety hazards associated with premature staining. Applying a sealant before the surface has had adequate time to dry may result in slick spots on walkways or decks which could be hazardous for anyone walking on them. To avoid this risk, it’s important to wait until conditions are just right before starting any staining projects.
By taking the time to properly prepare your project and allowing for sufficient drying time beforehand, you’ll be ensuring that your staining job looks its best and lasts for years – plus you’ll have peace of mind knowing that everyone is safe from any potential hazards!
Best Practices For Applying Stain
Applying a new coat of stain or sealant can be a rewarding experience, but it’s important to follow the best practices in order to achieve the desired outcome. To start, make sure that you choose the right type of product for your project. Not all stains and sealants are created equal and some may not be suitable for certain surfaces. Once you’ve chosen the appropriate product, it’s time to begin prepping the area. This includes cleaning away any dirt or debris, pressure washing if necessary, and allowing ample drying time before applying any sealant or stain.
When it comes time to apply your product, use a brush or roller specifically designed for staining and make sure to follow the manufacturer’s instructions carefully. You’ll also want to ensure that you have adequate ventilation while working with any harsh chemicals as they can be hazardous if inhaled over extended periods of time. Additionally, make sure that you wear protective clothing such as gloves and safety glasses when staining in order to avoid any potential hazards.
Finally, take your time and apply multiple thin coats rather than one thick layer – this will help ensure even coverage which will result in an optimal finish. With patience and care during every step of the process, you’ll be able to enjoy your newly stained surface for years to come!
Preparing The Surface For Maximum Absorption
Now that you understand the best practices for applying stain, it’s important to ensure that the surface is properly prepared in order to maximize absorption. This is especially vital if staining a new, untreated surface as the wood needs time to absorb the product more effectively.
To begin, make sure that the area is completely dry before you start. Water and other liquids can affect how well the stain absorbs into the surface and can also cause discoloration or other damage. If pressure washing was necessary, allow at least 48 hours for drying before proceeding with staining.
Finally, sand any areas which may have splinters or rough patches as this will help create a smoother finish when applied. Gently sanding down any uneven surfaces will also help ensure maximum absorption of your chosen product and a beautiful final result!
Finishing Touches After Staining Application
Once the staining process is complete, there are a few finishing touches that can help to preserve the beauty and quality of your surface. First, make sure to check for any drips or runs and remove them with a clean cloth. This will help ensure that the stain has an even finish and that the color is consistent.
It is also important to protect the newly stained surface from UV rays as these can cause fading and discoloration over time. The best way to do this is by applying a sealant or protective coating once the stain has fully dried. This will help maintain the vibrancy of your chosen hue while providing additional protection against spills and other accidents.
Finally, always keep in mind that even with proper preparation, maintenance will be necessary to keep the surface looking its best for years to come. Regular cleaning, checking for signs of wear, water damage, and other potential issues can help extend the life of your wood surfaces and keep them beautiful for many years.
Clean Up And Maintenance Suggestions
 Now that your staining project is complete, it’s time to consider the cleanup and maintenance necessary to keep your surfaces looking their best. After pressure washing, it is important to wait a minimum of 48 hours before applying any stain or sealant. This allows the wood to dry completely and ensures that the staining process will be successful.
When it comes to cleaning, you’ll want to avoid using harsh chemicals or abrasive materials as these can damage the surface and affect the color of your stain. Instead, use a mild soap solution and clean cloths for regular cleaning needs. For tougher stains, you may need to use a stronger solution but be sure to test it in an inconspicuous area first.
Finally, make sure you check for signs of wear or water damage regularly and take action as soon as possible if any issues arise. With proper care and maintenance, your stained surfaces should look vibrant and beautiful for years to come.
Alternatives To Traditional Staining Methods
With all the options available nowadays, traditional staining methods are no longer the only way to get the look you want for your surfaces. There are several alternatives that can provide the same level of protection and aesthetic appeal without the mess associated with staining.
One option is to use a wood sealant. These products come in a variety of finishes and colors, making them great for matching your existing décor or creating an entirely new look. Wood sealants provide a waterproof barrier that helps protect against moisture damage and can be applied quickly and easily, often with just one coat.
Finally, there’s also paint to consider. Paint offers a wide range of colors and textures that can completely transform any space in no time at all. Plus, it’s easy to touch up in spots where wear and tear inevitably occur over time. With so many options available, it’s easy to find something that will work perfectly for your needs.
Factors That Affect Staining Durability
Having considered several alternatives to traditional staining methods, it’s now important to consider how these will affect the durability of the finished product. There are a number of factors that can determine how long your stain will last, such as the type of wood, the climate in which you live, and your cleaning and maintenance routine.
When it comes to wood types, some woods are more porous than others and absorb stains more quickly. Softwoods like pine tend to absorb stain quickly and need to be resealed often, while hardwoods like oak take longer and can last for years without needing additional maintenance. Your climate also plays an important role since humidity and temperature can cause staining materials to break down faster.
Finally, proper cleaning and maintenance is key if you want your stained surfaces to keep their beauty for years. After pressure washing your surfaces, it’s recommended that you wait at least 24 hours before applying any staining products so that they have time to dry completely. This helps ensure that the stain adheres properly and lasts longer. Regular cleaning with a mild soap or detergent also helps extend its lifespan by removing any dirt or debris buildup on the surface.
Conclusion
 Staining is a great way to add beauty, protection, and value to any home. It’s important to take the time to properly prepare the surface before staining, including pressure washing. This ensures that the stain will adhere better and last longer. Knowing how long to wait after pressure washing before applying stain is also essential in order to achieve optimal results. Generally, it’s recommended to wait 24 hours before staining after pressure washing, but this can vary depending on humidity and other factors. Additionally, depending on the type of wood you are using, there may be additional steps that need to be taken prior to staining.
Before starting any project involving staining or pressure washing, it’s important to understand all safety precautions and instructions given by manufacturers in order to ensure that the job is done correctly and safely. Stains come in many varieties and colors so it’s also important that you choose the right one for your project. Alternatives such as paint or sealant can also be used for outdoor projects if desired. Taking proper care of your stained surfaces by cleaning them regularly will help keep them looking beautiful for years.
With a little preparation and knowledge about proper staining techniques you can have beautiful results with lasting durability. Pressure washing is an essential part of prepping for a staining project and knowing how long to wait before applying stain will help ensure success with your project every time.
Recent Comments